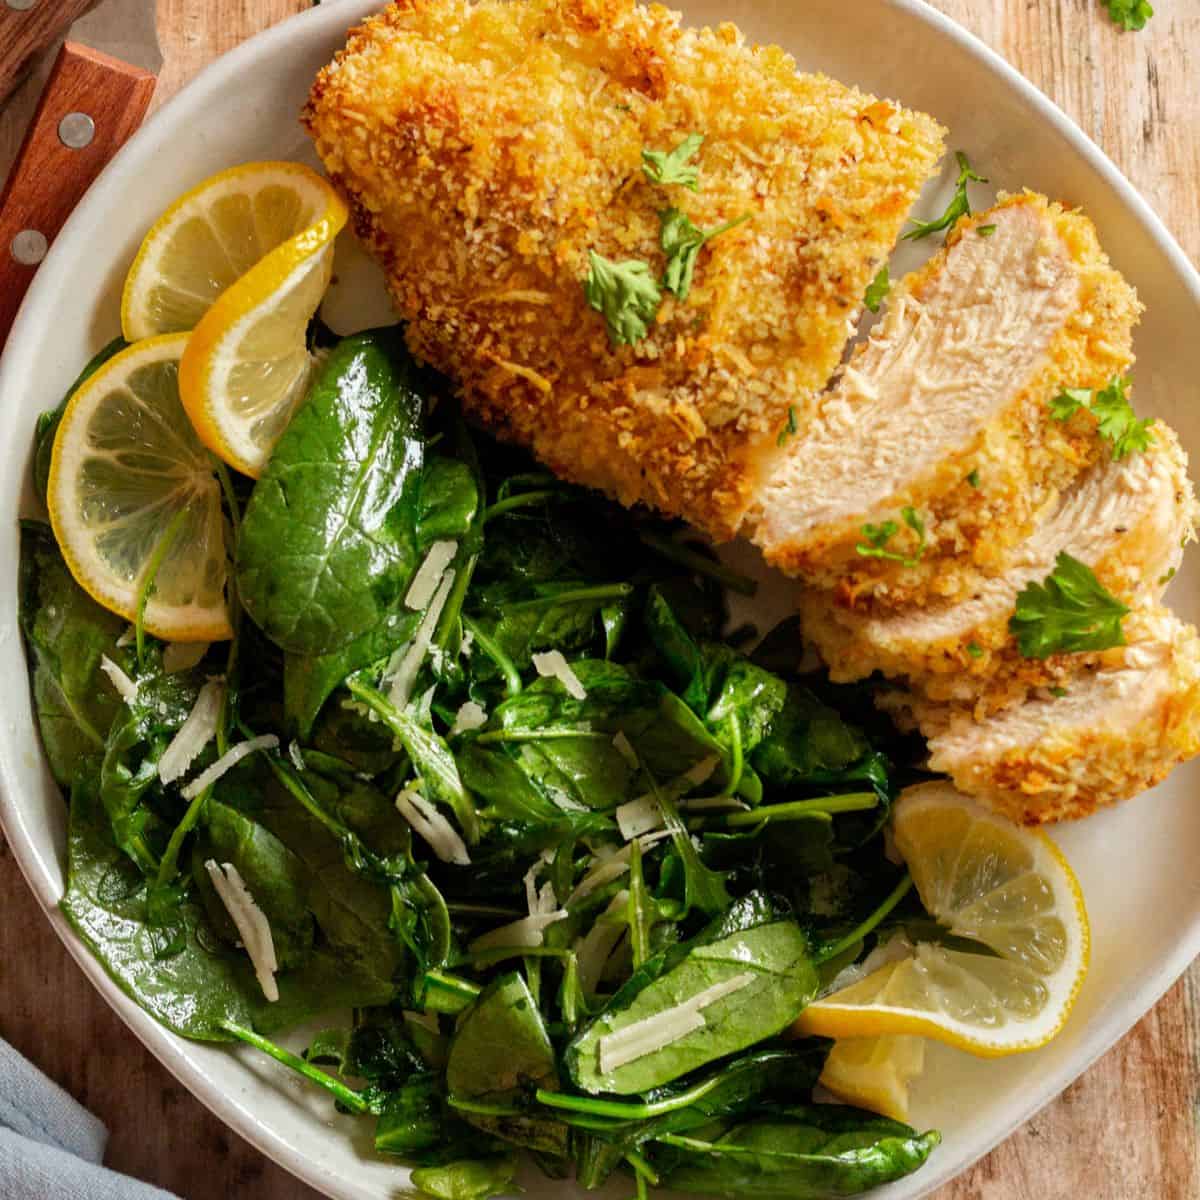
Made in just 30 minutes using a handful of pantry staples, this baked panko chicken is quick and easy to prepare, and unbelievably delicious! Juicy chicken breasts are coated in bread crumbs and parmesan cheese and baked until crisp-no deep-frying needed!

Skip the fatty, fried chicken and premade frozen chicken fingers! These no-fry baked panko chicken breasts are a lighter and healthier alternative that is guaranteed to satisfy your crispy chicken cravings!
Unlike fried panko chicken cutlets (or fried pork cutlets), these baked panko chicken breasts don't require any added oil or pan-frying, yet become crispy and crunchy on the outside while remaining seriously juicy and tender on the inside!
And, even better, they're prepared in just 10 minutes and baked in only 20 minutes! The perfect last-minute dinner idea!
Serve baked panko chicken with 25-minute garlic basmati rice and 15-minute sautéed kale and mushrooms for a healthy, balanced meal you'll feel great about feeding your family!
Jump to:
Why you'll love this recipe
- Texture - Compared to plain breadcrumbs, panko breadcrumbs are light, airy, and flaky, and produce a crispier, crunchier bite.
- Flavor - The chicken breasts are seasoned with a paprika and garlic powder blend before they're coated in a parmesan and panko mixture, building layers of flavor throughout the coating.
- Family-friendly - Panko-crusted chicken is loved by even the littlest taste-testers! It's a guaranteed crowd-pleaser!
- No-fry - Oven-baked panko chicken is a much healthier alternative to the high-fat, oil-laden fried options.
- Quick and easy - A 30-minute dinner using common ingredients makes it perfect for busy weeknights!
Ingredients needed
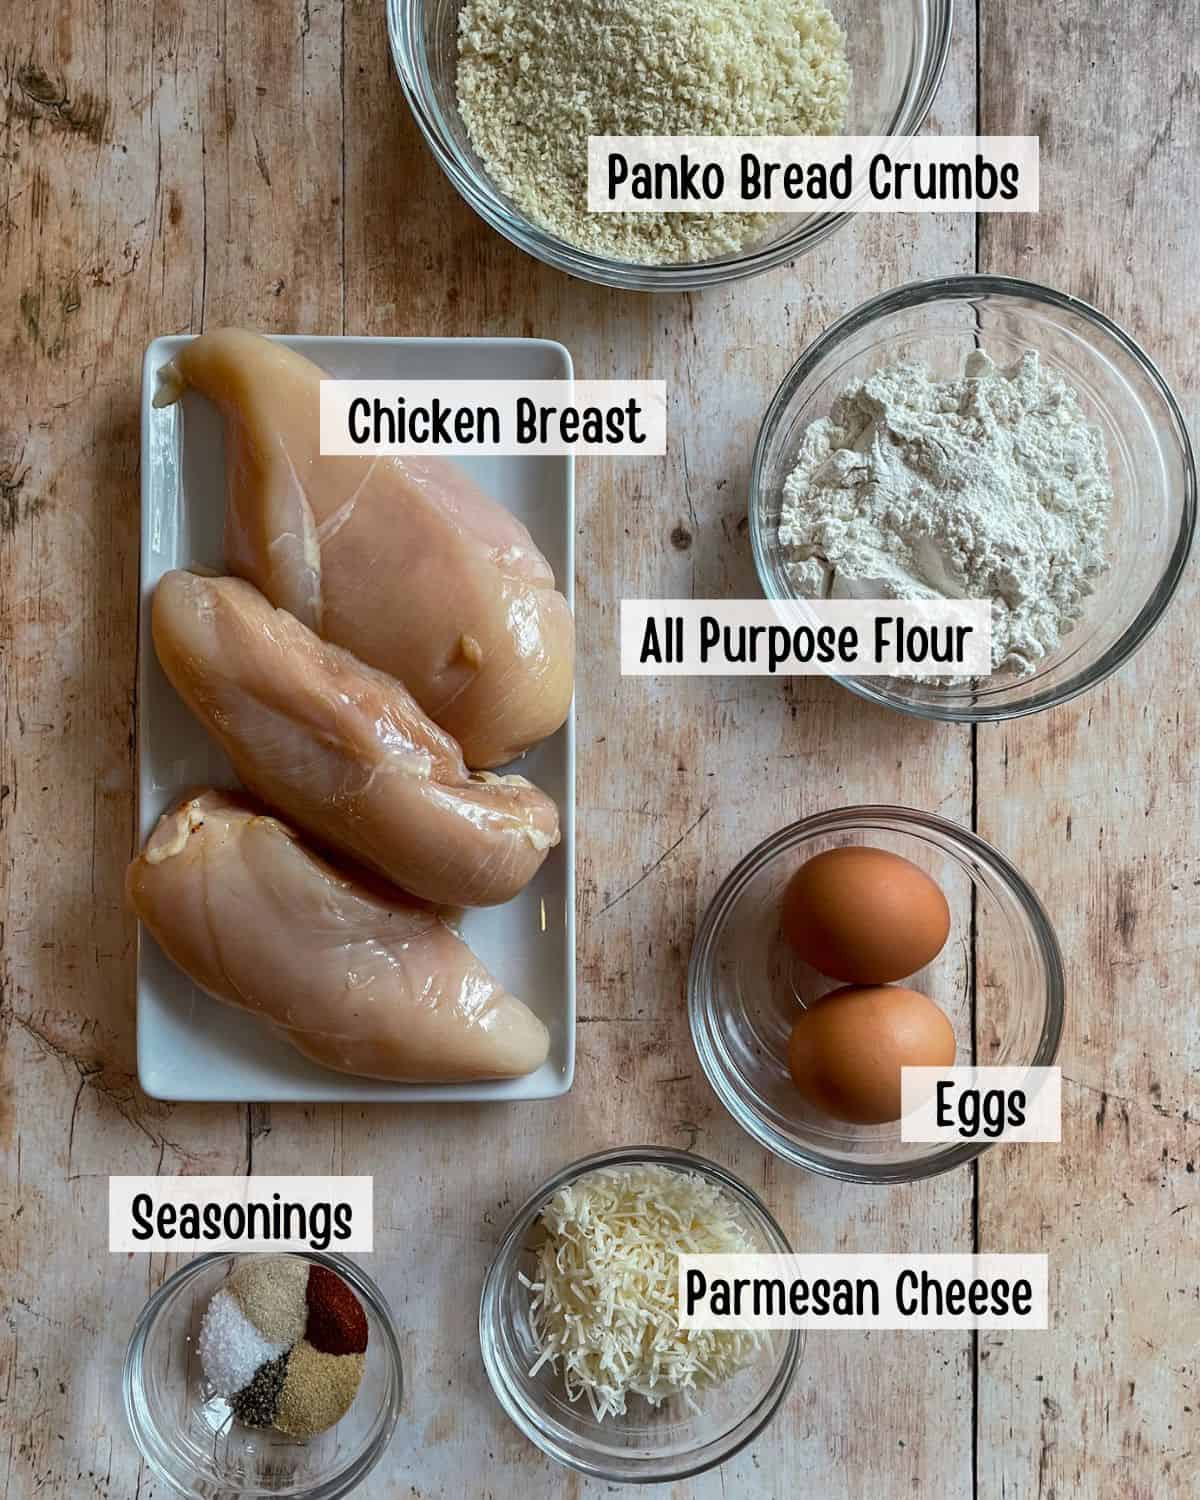
- Chicken breast - Use boneless, skinless chicken breasts and trim any large pieces of fat and tendons from the edges. Although trimming the fat takes a little extra time, it ensures tastier baked chicken. I always make the time to do this!
- All-purpose flour - Absorbs moisture from the chicken, providing a base layer for the egg to stick to.
- Panko breadcrumbs - A Japanese-style breadcrumb sold in most grocery stores next to the traditional breadcrumbs. Compared to standard breadcrumbs, panko breadcrumbs are larger in size with a coarse texture.
- Eggs - Gives the chicken breasts a moist coating that helps the breadcrumbs adhere evenly to the chicken.
- Parmesan cheese - Freshly shredded is always best! This will add to the crispy texture and provide a savory, salty flavor component.
- Seasoning - The initial layer of flavor, containing kosher salt, black pepper, garlic powder, onion powder, and paprika.
Equipment needed
- You'll need three shallow mixing bowls for the flour, egg, and breadcrumb breading station.
- A medium-sized baking sheet with a baking rack allows air to flow under the panko-crusted chicken, guaranteeing crispy baked chicken on all sides.
- You can still make this panko chicken recipe without a baking rack, though the bottom of the panko chicken will not get crispy.
How to make Baked Panko Chicken
Recipe rundown
- Tenderize the chicken using a meat mallet.
- Season both sides of the chicken breast with the seasoning blend.
- Coat the chicken in flour, eggs, then panko and parmesan cheese.
- Bake at 425°F for 20 minutes, or until cooked through.
Step-by-step instructions
Step 1: Place the chicken breasts between two pieces of parchment paper or plastic wrap. Pound (tenderize) them with a meat mallet or a rolling pin until each breast is about 1 inch thick.
Step 2: Combine the seasonings in a small bowl, then sprinkle the seasoning blend evenly onto both sides of the chicken breast.

Step 3: Measure the flour out into a medium-sized mixing bowl. Crack the eggs into a separate mixing bowl and whisk until smooth. Pour the panko bread crumbs and the shredded parmesan cheese into a third mixing bowl.
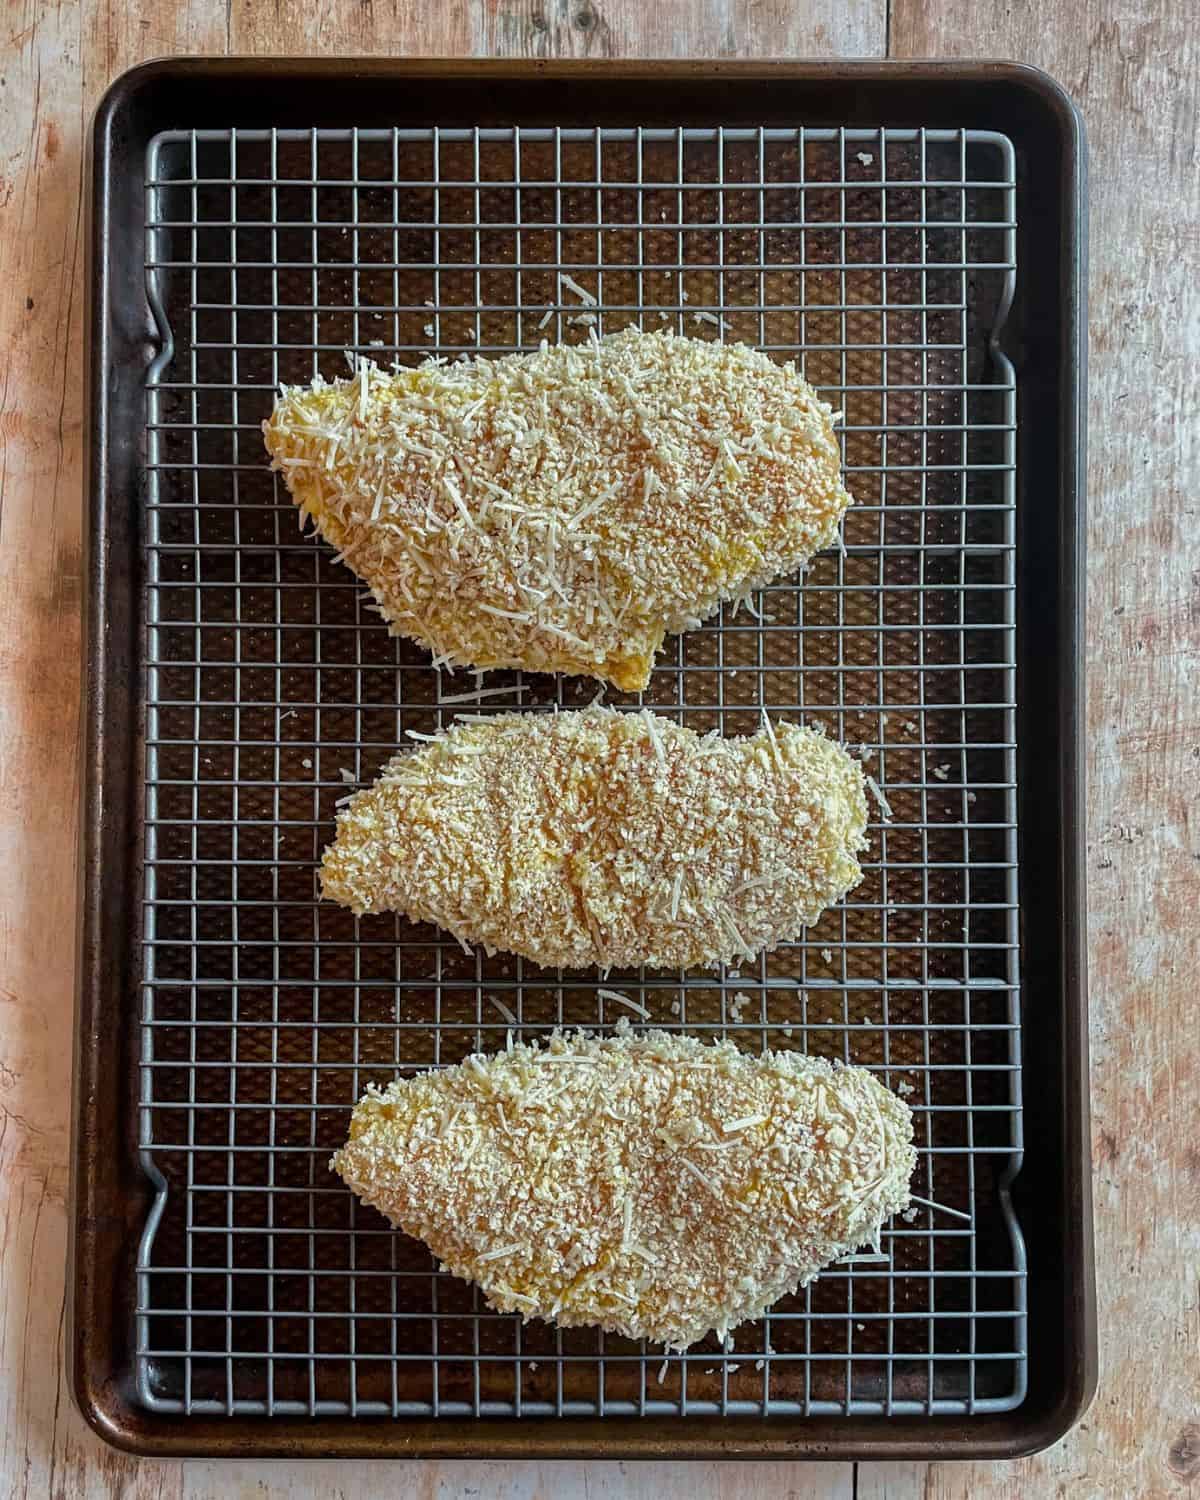
Step 4: Bread the chicken. First, coat each side of the chicken breast in flour. Then, dip it into the whisked eggs. Lastly, press both sides of the chicken into the panko parmesan blend.
Step 5: Transfer the panko chicken to a baking sheet topped with a cooling rack and bake the chicken for 20 minutes at 425°F, or until cooked through.
Step 6: When the chicken has finished cooking, remove it from the oven and let it rest on the cooling rack for about 5 minutes. Then, serve and enjoy!

Expert tips
- Check for doneness using a digital meat thermometer. Continue cooking the chicken if it has not reached an internal temperature of at least 165°F.
- Serve immediately for the best texture. Baked panko chicken has the most flavor and crispiness if it is served as soon as it comes out of the oven. It will lose its crispy texture if it is left at room temperature for too long.
- Use the 3-step breading process. Start with the flour, then the eggs, and lastly, the panko bread crumbs. This will ensure the breadcrumbs stay stuck to the chicken and form a crispy crust.
- Press the chicken breasts firmly into the panko breadcrumbs to ensure all sides are evenly coated.
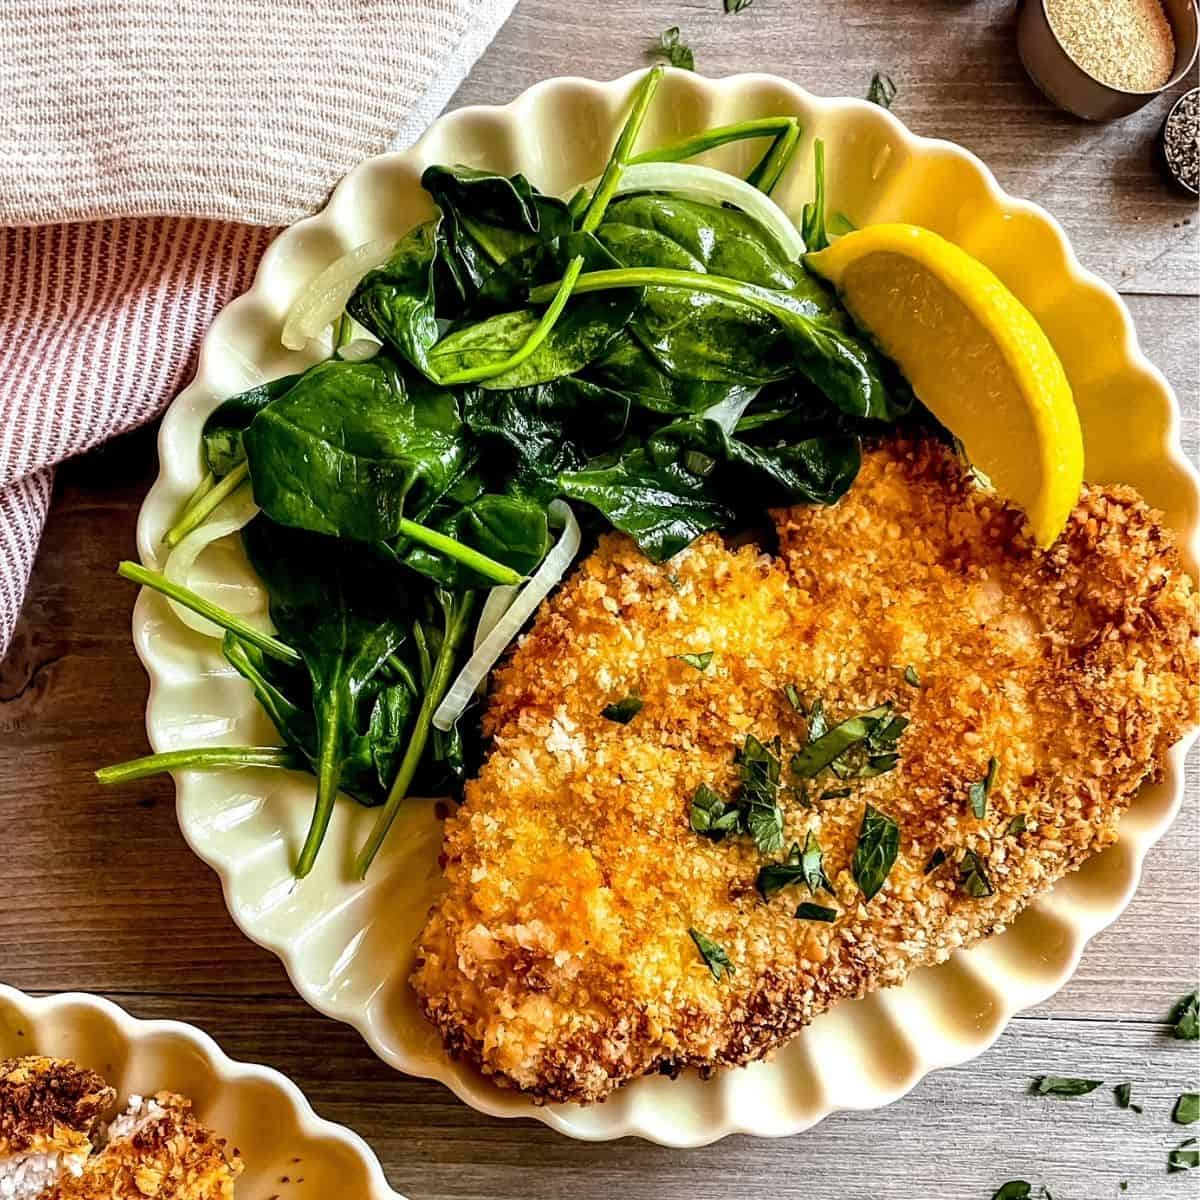
What to serve with panko chicken
To create a well-rounded meal, pair baked panko chicken with a starchy side dish, such as potatoes, rice, or pasta, and a light vegetable. Here are some of my favorite side dish recipes:
Recipe variations
- Skip the tenderizing step, and substitute the chicken breasts with chicken cutlets or thin-sliced chicken breasts. Just remember, a thinner cut of meat will likely take less time to cook! Start checking for doneness after 10 minutes.
- Get creative with the seasoning blend! Like it spicy? Add a dash of cayenne pepper. Are Italian herbs your jam? Include dried oregano, parsley, and basil. Or, keep it simple and use an all-purpose seasoning blend.
- Serve panko chicken over salad greens, as chicken parmesan, or in sandwich form! Toss it into pasta or drizzle with BBQ sauce, Buffalo sauce, or hot honey.
Storing tips
- Leftover chicken can be stored in a glass, airtight container in the refrigerator for up to 3 days.
- I do not recommend making this recipe in advance because the chicken will lose its crispy texture as it cools.
- The best way to reheat panko chicken is in the oven until warmed through or in a skillet on the stovetop over low heat.
Frequently asked questions
Panko will stick to the chicken if it is coated in a wet ingredient like eggs or mayonnaise. Once the chicken is adequately coated, firmly press it into the panko bread crumbs.
Panko chicken is crispiest right after it comes out of the oven, so it's best to enjoy it immediately after it's cooked. It will lose its crispy texture as it cools to room temperature. A light coating of oil over the breadcrumbs might help it get even crispier as it bakes.
No, panko bread crumbs can be baked. They're also delicious in the air fryer, like in this air fryer chicken cutlet recipe.
More chicken breast recipes you'll love
30-Minute Baked Panko Chicken
Ingredients
- 2 pounds boneless skinless chicken breasts
- 1 teaspoon kosher salt
- ¼ teaspoon ground black pepper
- ½ teaspoon garlic powder
- ½ teaspoon onion powder
- ½ teaspoon smoked paprika
- ¾ cup all-purpose flour
- 2 eggs
- 1 ¼ cups panko bread crumbs
- ¼ cup shredded parmesan cheese
Instructions
- Preheat your oven to 425°F.
- Lay the chicken breast out on a flat surface. Cover with a sheet of parchment paper or plastic wrap. Evenly pound the chicken breast using a meat mallet or a rolling pin. You want the chicken to reduce to about 1 inch in thickness.
- In a small bowl, combine the salt, pepper, garlic powder, onion powder, and smoked paprika. Season both sides of the chicken breast pieces with the seasoning blend.
- Measure the all-purpose flour into a medium-sized mixing bowl. Crack the eggs into a separate medium-sized bowl and whisk to combine. Mix the panko bread crumbs and parmesan cheese into a third, medium-sized bowl.
- Bread the chicken. Start by pressing both sides of the raw chicken breast into the flour. Then dip the chicken into the eggs. Lastly, press both sides of the chicken into the panko bread crumbs. So you'll start with the flour, then dip into the eggs and finish with the panko parmesan bread crumbs. Repeat this process with all of your chicken pieces.
- Place the panko chicken onto a baking sheet topped with a cooling rack. The cooling rack will allow air to flow around all sides of the panko crusted chicken, resulting in a crispy coating on all sides.
- Bake the panko chicken for 20 minutes at 425°F. Check for doneness using a digital meat thermometer. If the internal temperature has not yet reached 165°F, continue cooking the chicken. When finished, remove from the oven and let rest on the cooling rack for 5 minutes. Slice into bite-sized pieces and enjoy! Panko Chicken is best when served immediately.
Nutrition
Notes
- If you are using chicken cutlets, you can skip step number 2.
- If you do not have a cooling rack, then a foil-lined baking sheet will work. The bottom of the panko-crusted chicken may not be as crispy, though.
- The nutrition information is an estimate provided by an online nutrition calculator. It should not be considered a substitute for professional medical advice.

Katie says
Such a family-friendly, healthier alternative to fried panko chicken! It's my new favorite family dinner recipe!
Katie says